|
»Click here to display Table of Contents«
|


Defining Calendars |

|

|

|
|
Defining Calendars |
|
|

|
|
»Click here to display Table of Contents«
|
Defining Calendars |
|
|
|
|
Defining Calendars |
|
|
|
|
|
||
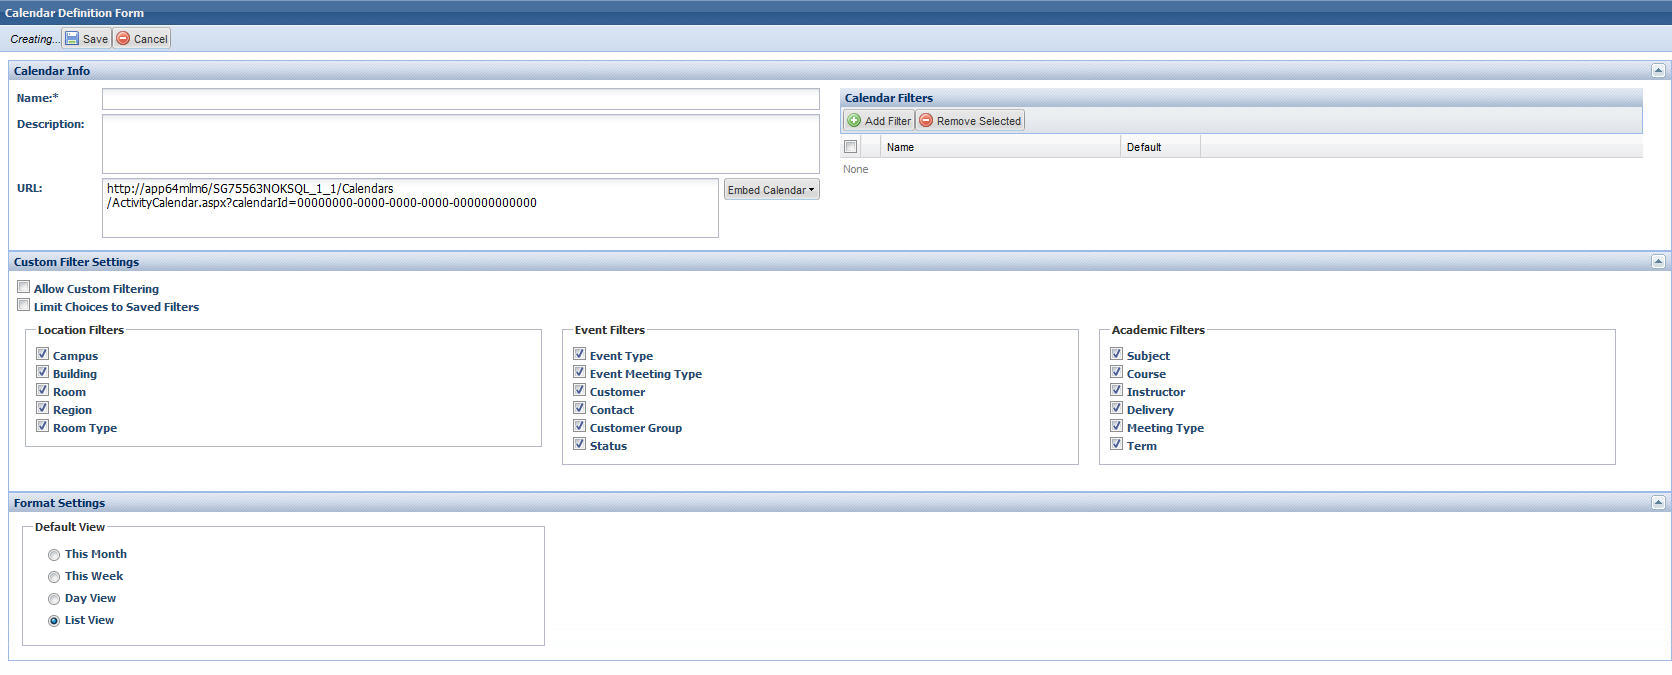
Calendars must be defined and saved in order to provide calendar choices for user role association and when browsing the calendar user interface. These calendar definitions include the name of the calendar as it will appear during use, pre-assigned filter choices specific to that calendar, custom filtering availability, and the default view when the calendar is accessed.
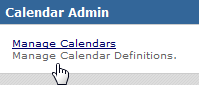
Many different versions of the Calendar can be created and saved in order to provide the appropriate levels of access for users and guests, as well as to create convenient, pre-filtered choices when navigating the calendar. The Manage Calendars option on either the Calendars or Setup tab provides access to a list of all configured calendar tools, including Calendars, Scheduling Grids, and the Search tool.
To define a new Calendar, perform the following:
1.Click the Manage Calendars option on either the Calendars or Setup tab.
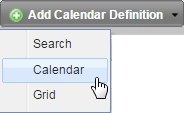
2.On the Calendar Definition List page, click Add Calendar Definition, and then select Calendar.
3.Enter a descriptive name for the calendar. This is the name that will be visible when assigning calendar access to users as well as when choosing a calendar to view in the calendar interface. The name should help users understand the calendar content.
4.If desired, enter a description.
Pre-Assign Filters
If desired, pre-assigned filters may be created to help users navigate activities when viewing the calendar.
5.Click Add Filter.
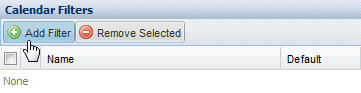
6.Enter a name for the filter being created. If desired, check the box to make the filter the default activity view when the calendar is used.
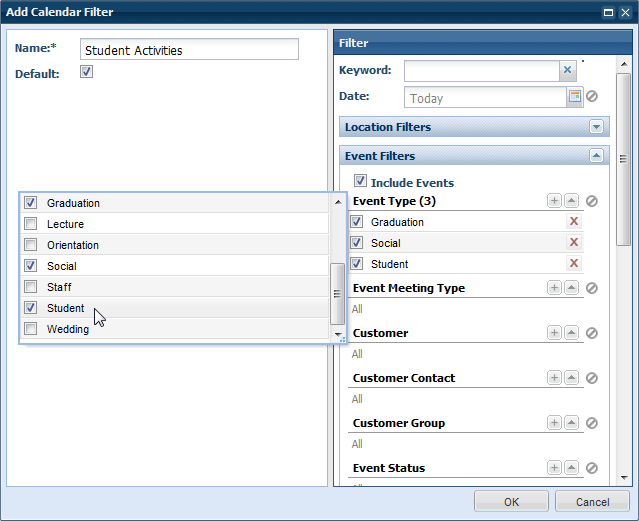
7.In the Filter panel, enter Keyword search criteria and/or a search start date if applicable.
8.Use the scroll bar to access the desired filter options. Filters may be created that include or exclude events and academic sections, and limit results based on various attributes. Additionally, the activities returned by a filter can be limited to certain spaces using the location settings.
Use the + button to select one or more filter options to limit the activities returned by the calendar.
9.Click OK to save the filter and display it in the calendar definition.
Custom Filter Settings
The Custom Filter Settings section of the calendar definition controls whether or not a user may edit the calendar filter, and if so, to what extent.
10.To provide access to the filter settings for a user when viewing the calendar, place a check in the box next to Allow Custom Filtering.
This setting is the on/off switch for the filter option in the calendar as a whole.
11.If filter access is provided above, add or remove check marks in each of the filter categories (Location, Event, and Academic) to specify which filter types are available to the user.
These choices determine which drop-down filter options are available to the user when editing the filter.
12.Finally, you may limit the scope of filter choices presented to the user to only those choices granted by the pre-assigned filters defined above.
For example, you may wish to pre-assign a filter that limits event activities to only a few event types taking place in key buildings on campus. If you would like to allow users to edit the filter but be confined to those event types and buildings, then place a check in the box next to Limit Choices to Saved Filters.
Format Settings
13.Select the desired option for the default time frame displayed for the calendar.
14.Click Save.
